
A backsplash is a small part of a kitchen by area, but it sits at eye level along every counter, so it does a lot of the work of making the room look finished. It also has a practical job. It protects the wall behind the sink and the cooktop from water, grease and splatter, and it gives you a surface you can wipe down.
Salt and Cedar Home Remodeling is a locally owned remodeling company in Nashville, and kitchens are the core of what we do. Alec handles backsplash installation as part of a full kitchen remodel, alongside new cabinets and counters, or on its own when your counters are staying and the wall behind them is ready for a change. Either way, Alec is your one point of contact, from the first visit to the final walkthrough.
This page walks through how a backsplash goes in, what affects the cost, and the questions homeowners ask most often: whether tile can go on drywall, what to do when a counter is not level, and how to measure for one yourself before you call.
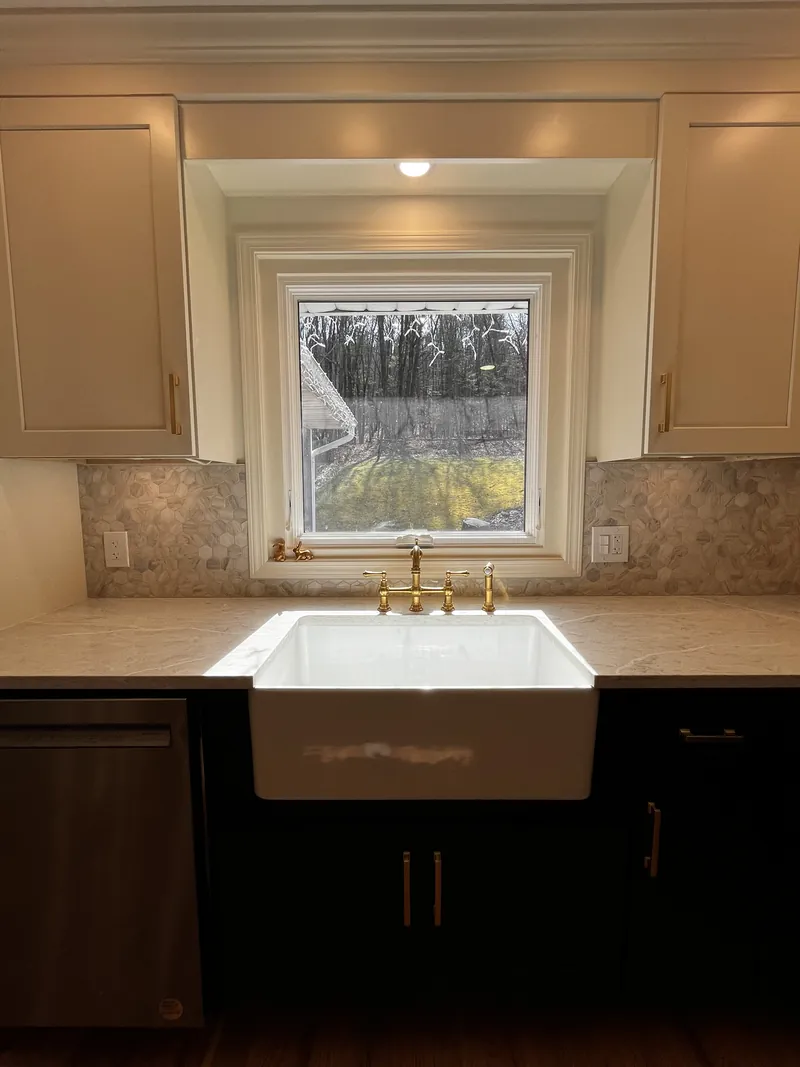
Choosing a kitchen backsplash
The backsplash is chosen after the counters, not before. Counters have the most pattern and color in most kitchens, so the tile should work with them rather than compete. If you are remodeling the whole kitchen, Alec helps you pick the cabinets, counters and backsplash together, before anything is ordered.
Ceramic and porcelain tile
Ceramic and porcelain are the most common backsplash tiles. Subway tile is the familiar choice, and it comes in many sizes, finishes and colors. The layout changes the look as much as the tile does: a standard offset, a stacked grid, a vertical stack or a herringbone each read differently on the same wall. Porcelain is denser and holds up well behind a range.
Glass, stone and mosaic tile
Glass tile reflects light and is easy to clean, but it shows the adhesive behind it if it is set poorly, so the setting method matters. Natural stone and marble mosaics add texture and pattern. Stone is porous, so it needs to be sealed and resealed over time, which is worth knowing before you choose it for the wall behind a stove.
Full-height and slab backsplashes
Some kitchens carry the backsplash all the way to the ceiling, or use a slab of the countertop material on the wall behind the range. A taller backsplash is more material and more cutting, and the decision is easier to make while the layout is still being planned.
Grout and where the tile stops
Grout color changes the whole look. A matching grout makes the tile read as one surface, and a contrasting grout shows off the pattern. Where the tile stops also matters. The usual stopping points are the underside of the upper cabinets, the edge of the counter, or a clean vertical line at the end of a run. Deciding those edges before tiling is what keeps the finished wall from looking unplanned.
How a backsplash is installed
Can you put a kitchen backsplash on drywall?
Yes. Drywall in good condition is the usual surface for a kitchen backsplash. The wall needs to be flat, solid and clean. Any old adhesive, loose paint or damaged spots get fixed first, because tile will only be as straight and as sound as the wall it sits on. Areas that have had water damage, often behind the sink, are opened up and repaired before any tile goes on.
What goes behind a kitchen backsplash?
Behind the tile is the wall itself, then a layer of thinset mortar or tile adhesive, then the tile, then grout. The joint where the backsplash meets the counter is not grouted. It gets a bead of caulk, because the counter and the wall move slightly at different rates and grout in that corner tends to crack. The same goes for inside corners and the edges along cabinets.
How do you install a backsplash when the counter is not level?
Counters in older homes are often a little out of level. If you start the first row of tile right on the counter, the grout lines follow the slope all the way up the wall. The fix is to set a level line instead, start the tile from that line, and cut the bottom row to fit the counter. The small difference along the bottom is then hidden by the caulk line, and the rows above stay straight.
Outlets, switches and windows
Every outlet and switch on the wall means cuts around a box. Outlet boxes often have to be brought forward so the cover plate sits flat on the tile instead of sinking behind it. Window edges and the ends of each run are finished with trim pieces or a finished tile edge so you do not see raw cut tile.
How much does a backsplash cost to install?
We do not publish prices, because two backsplashes with the same square footage can be very different jobs. What drives the cost is easy to explain, though, and Alec walks you through it when he puts a quote together.
- The tile itself. Basic ceramic subway tile and hand-cut stone mosaic are very different materials to buy and to set.
- Size and layout. Small tiles and patterns like herringbone take more cuts and more time than a larger tile in a simple offset.
- The number of cuts. Outlets, windows, range hoods and short runs between cabinets all add cutting.
- The wall. Removing an old backsplash and repairing the drywall behind it is added work.
- Height. A full-height wall behind the range is more material and more labor than a standard backsplash.
Measuring for a backsplash and removing an old one
How do you measure for a backsplash?
Measure each section of wall on its own. For each one, measure the width along the counter and the height from the counter to the bottom of the upper cabinets, then multiply to get the area. Subtract windows and large openings, add the sections together, and then add extra tile for cuts and breakage. Patterns that take more cuts need more extra. Buy all the tile at once, from the same batch, so the color matches across the whole wall.
How do you remove a tile backsplash?
Removing tile starts with turning off power to the outlets on that wall and cutting the caulk along the counter. The tile is then pried off a few pieces at a time. The drywall behind it almost always comes away in places, because the adhesive grips the paper face. Depending on the damage, the wall gets patched and skimmed flat or that section of drywall is replaced. Care is needed along the counter so it does not get chipped or scratched.
How a backsplash project runs with Alec
It starts with a visit. Alec looks at the wall, the counters and the outlets, and talks with you about the look you want. If the backsplash is part of a larger kitchen remodel, it goes into the overall plan with the cabinets and counters. You get a free estimate that lays out the work and a schedule for it.
On a full remodel, the backsplash goes on after the counters are installed, since the tile is set to the finished counter. On a backsplash-only job, the wall is prepped, the tile is set and grouted, and the edges are caulked. At the end, Alec walks the wall with you before the job is called done.
A backsplash often comes up alongside other changes. Read about kitchen remodeling if you are thinking about the whole room, kitchen cabinets if the cabinets are being replaced, or kitchen flooring if the floor is next. When you are ready, tell us about your kitchen.
Why homeowners call Alec for a backsplash
- One point of contact. Alec runs the project himself from the first visit to the final walkthrough, so you are not passed between people.
- Help choosing the tile. Alec helps you pick the tile, layout and grout to suit the counters and cabinets before anything is ordered.
- Kitchen-focused. Kitchens are the core of what Salt and Cedar does, so the backsplash is planned as part of the room.
- Locally owned in Nashville. We serve Nashville, Brentwood, Franklin, Hendersonville, Mt. Juliet, Nolensville, Hermitage and Bellevue.